API Setup
For DBX to submit the processing data and receive the confirmed or denied the API Key and password need to be created.
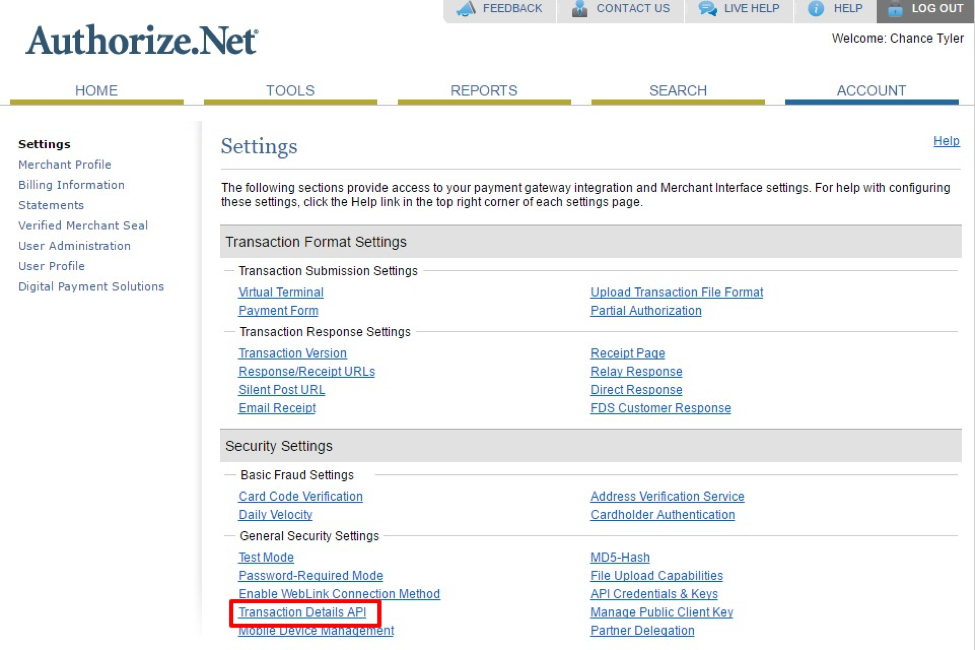
Enable Transaction Details API
Account > Transaction Details API > Enable Transaction Details API, enter your Secret Answer for the Secret Question and click Enable Transaction Details API.
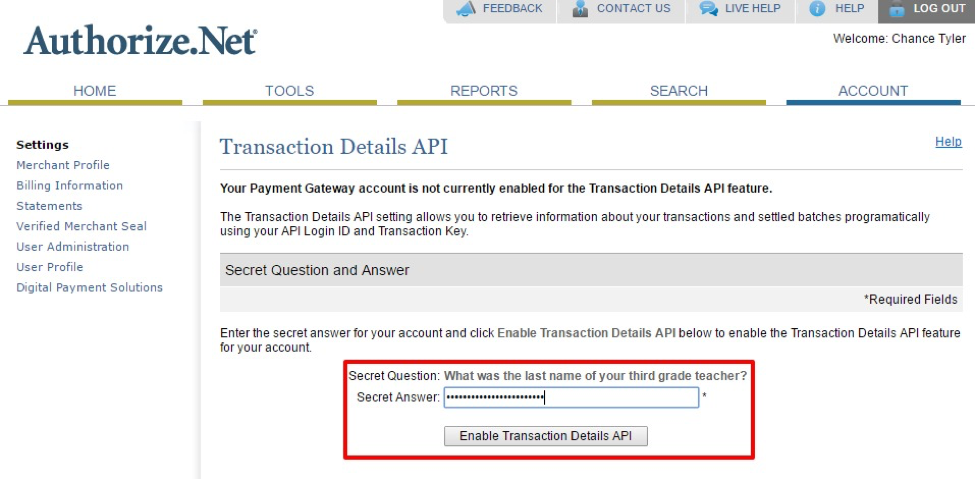
Once enabled you will be automatically redirected back to the “Account” tab where you can then setup the API Credentials & Keys.
Create API Credentials and Keys
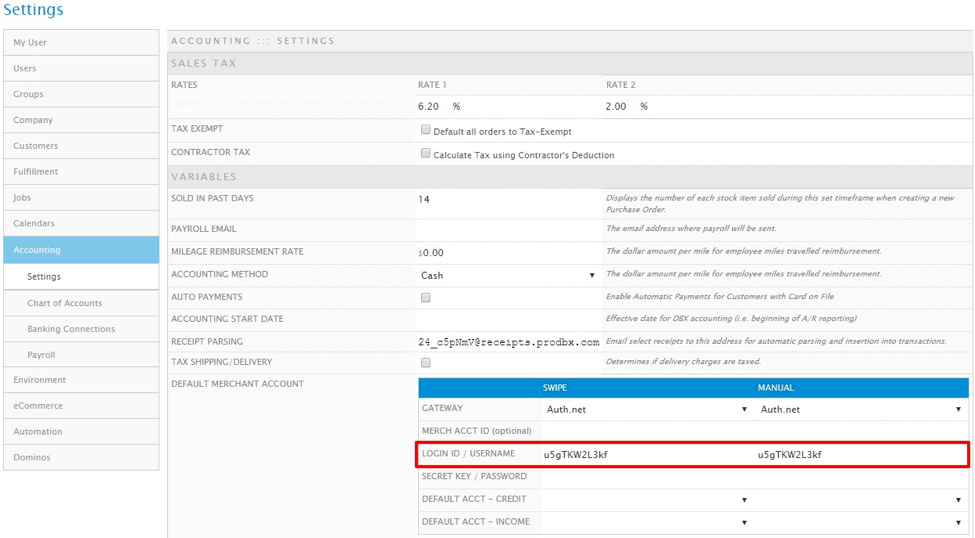
You will now need to create API Credentials and Keys which will be copied into your DBX admin settings. Account > API Credentials & Keys > Copy API Login ID

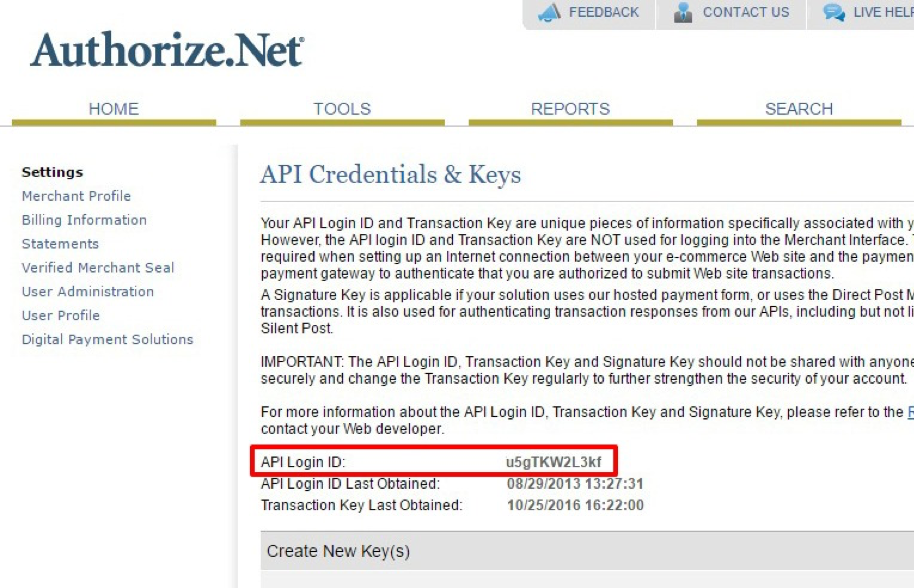
Copy the API Login ID and enter it into your DBX Settings > Accounting > Default Merchant Account > Login ID/Username. The Merchant Acct ID is optional in DBX and is really there to help you distinguish between merchant accounts if you are using multiple. If your merchant account is setup to take swipe or manually key in then you want to copy the same information into both Swipe and Manual fields. If you have separate merchant accounts for swipe or key-in (sometimes there is an advantage on rates by separating the accounts), then you would do the same process we are showing you now for both of those accounts.
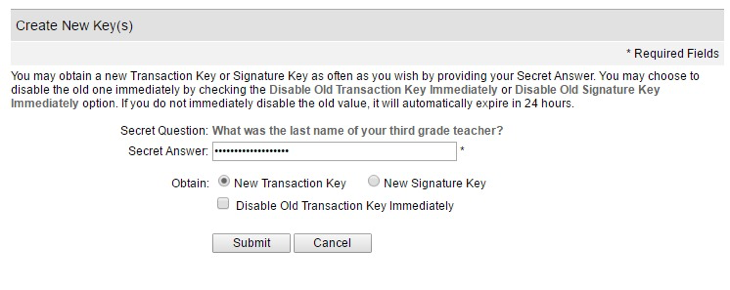
Go back to Authorize.net and enter your secret answer > New Transaction Key > Disable Old Transaction Key Immediately (this is optional if you have a previous Transaction Key and do not select this then it will disable automatically in 24 hours) > Submit
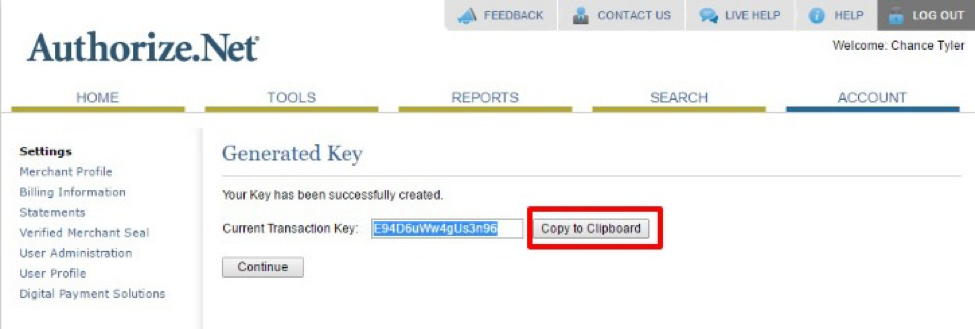
You will now have generated a key. Click “Copy to Clipboard” then Continue.
Go back to your DBX admin settings > Accounting > Default Merchant Account > Secret Key/Password.
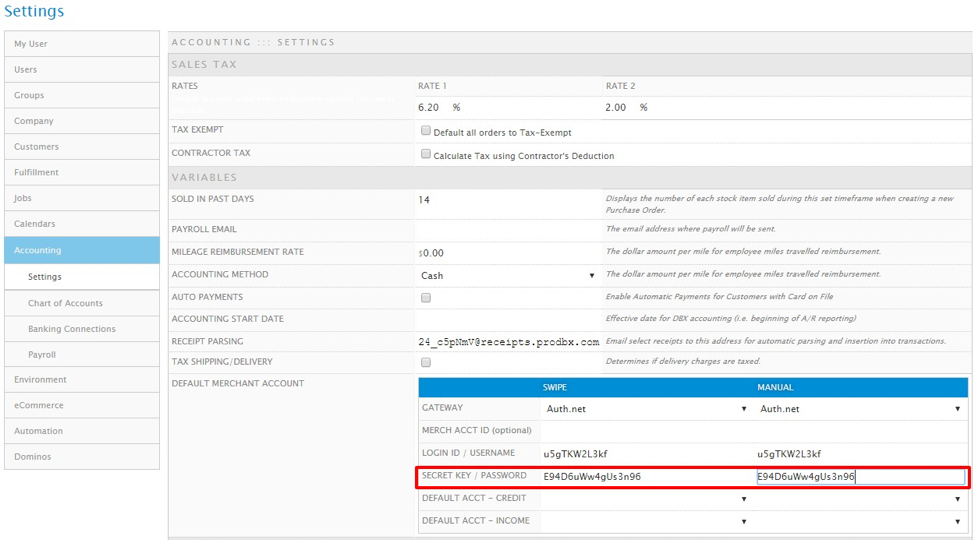
After all the information has been entered correctly then click Save on the bottom right of your screen.
You should now be able to take payments through DBX and save cards on file.